
Editing guide
How to Crop iPhone Film Photos Without Cutting Off Date Stamps
Keep date stamps readable in iPhone film photos with a crop-first workflow, room around the edges, and separate versions for square and portrait sharing.
Decide the final shape before adding the stamp
A date stamp can make a casual photo feel like a print from a particular day, but it also creates something important near the edge. A crop that looks balanced around the people may slice through the numbers. The easiest workflow is to keep an unstamped original, settle on the final picture shape, and add the stamp to that version.
If you want both a square photo and a taller portrait version, treat them as separate compositions. Make each crop from the unstamped source using your usual crop tool, then apply the film treatment and stamp. Do not assume that one finished, stamped image will fit every shape.
Check whether the date is already part of the image
Open the saved photo itself and check the corner. If the numbers are visible in the saved image, treat them as image content for cropping purposes. A normal crop trims the date along with anything else outside the frame; it does not move the numbers inward.
When you still have an unstamped original, start there. If the stamped copy is the only version available, try a looser crop that preserves the complete date. You may need to keep the existing shape or deliberately crop out the entire stamp. Half a date usually looks accidental.
- Keep the source photo alongside your finished version.
- Check the exported photo rather than relying only on a camera preview.
- Leave visible breathing room between the date and the nearest edges.
- Make a separate copy before trying a substantially tighter crop.
Use the snowy preview to spot competing details
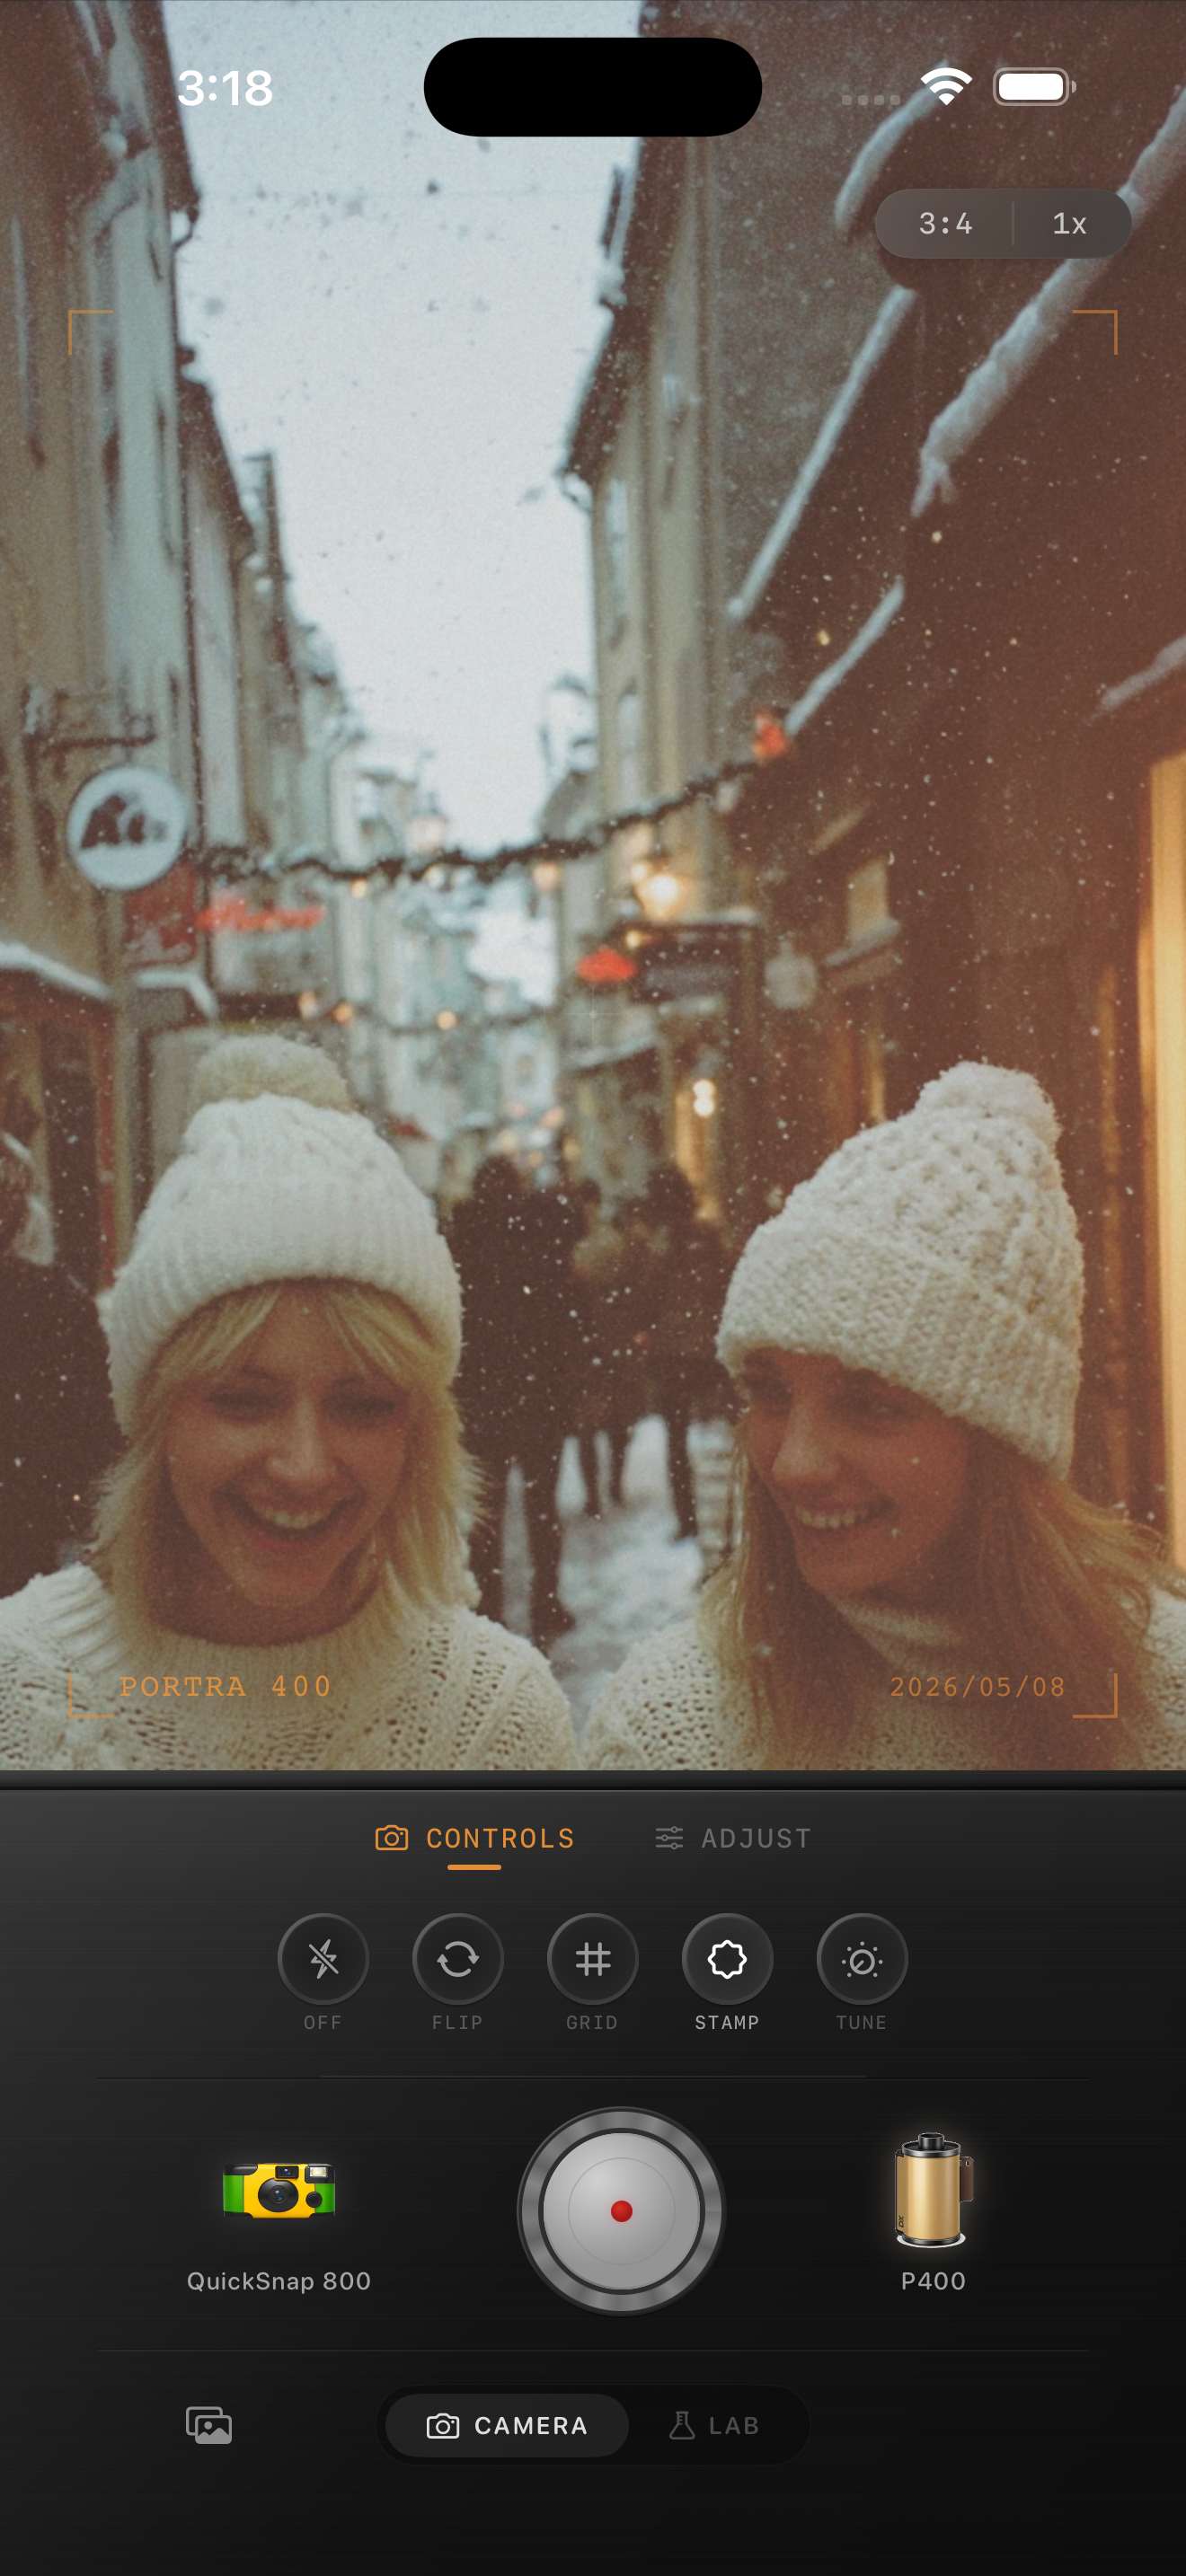
In the preview above, orange date numbers sit near the lower-right edge of the photograph, close to a light knitted scarf. The friends occupy much of the lower part of the frame. A tighter crop needs to account for both the people and the stamp, rather than treating the corner as empty space.
Use this image as a placement exercise: imagine a square crop and check what happens to the hats, faces, and numbers. Judge the photograph inside the app interface; the controls below it are not part of the photo. If keeping the stamp forces an awkward crop around a face, use an unstamped version for that layout.
Film and camera names visible in this preview describe style inspiration. Nostalgia Cam is not affiliated with Kodak, Fujifilm, or other camera or film manufacturers.
Keep the stamp readable without rebuilding the whole edit
A bright or busy corner can compete with small numbers. Look at the stamp with the whole picture visible, then check whether every digit is easy to distinguish. Avoid darkening the entire photograph just to improve a tiny corner if the faces already look right.
If your chosen editor offers stamp placement, try a quieter area with room around it. Otherwise, compare a stamp-free version or a different crop from the original. The useful choice is the one that keeps the people, composition, and date readable together; a stamp is optional.
Review each sharing version before posting
Open the final exported file and review it at the size you expect someone to see it. Check all the digits, the nearest hand or face, and the small gap between the stamp and the edge. Grain that suits the scene should not make the date compete for attention.
If a sharing preview trims the picture, return to your separate crop for that shape or adjust the framing offered there. Check the final preview again instead of assuming the full photo is visible. Keep the roomier version for uses where the complete composition matters.
Choose the date for its meaning
Before saving, check that the displayed date is the one you intend the photo to communicate. For an older imported photo, do not assume a visible stamp represents the day the picture was taken. Compare it with your own record of the occasion.
If the available stamp does not show the date you want and you cannot change it, leave it off. Warm color, restrained grain, and a good moment can carry the nostalgic feeling on their own. A clean composition is more useful than a decorative date that confuses the memory.
Finish a photo worth dating in Nostalgia Cam
Keep an unstamped original, prepare the crop you want, and import it into the Nostalgia Cam Lab. Choose a camera body and film look, refine the texture, and check the finished composition before deciding whether a date stamp adds to the memory.
FAQ
Should I crop a photo before or after adding a date stamp?
Crop first when you have an unstamped source. Settle on the final shape, then add the stamp and check the exported file. This helps avoid trimming numbers that were placed for a different frame.
Can I move a date stamp that is already saved into a photo?
A normal crop cannot move it independently of the picture. Return to an unstamped original if available. Otherwise, keep enough of the image to show the complete stamp or choose a crop that removes it entirely.
Do square and portrait film photos need separate stamped versions?
Separate versions are useful when the crops differ. Create each composition from the unstamped source, then check its stamp placement individually so faces and numbers both have enough room.